Uneven tile spacing can quickly ruin the aesthetic appeal of a DIY flooring project. Imagine perfectly matching grout lines marred by inconsistencies—a subtle, but noticeable flaw that detracts from the overall visual impact. This thorough guide delves into the common causes of uneven tile spacing in DIY floors and offers simple, effective ways to achieve consistent lines, ensuring a professional finish. We’ll cover essential tools, crucial measurements, and troubleshooting techniques to help you master this crucial facet of DIY tiling. This article will guide you through the process using practical examples and clear instructions. You’ll learn how to calculate tile spacing accurately, utilize spacing tools, and address any unexpected variations.
Understanding the Causes of Uneven Tile Spacing
Common Mistakes in DIY Tiling
Many DIY projects suffer from uneven tile spacing due to a number of mistakes. These include insufficient planning, inaccurate measurements, inconsistent tile placement, and improper adhesive application. Inaccurate measurements, for instance, can significantly impact the overall spacing and lead to noticeable gaps or overlaps. Similarly, inconsistencies in the application of tile adhesive can also contribute to uneven grout lines and an unappealing finish. Using a tile spacing tool can assist with consistency.
Factors Affecting Tile Spacing
Beyond the human element, several factors can influence tile spacing. Uneven subfloors, for example, can create inconsistencies in the final layout. Additionally, variations in the size and shape of tiles or tolerances in the manufacturing process can affect the alignment. Proper preparation of the subfloor before starting the tiling process is crucial for the achievement of your project. Tools like a spirit level, tile spacers, and a straightedge can significantly help to maintain consistency.
Accurate Measurements for Consistent Spacing
Related Post : DIY Paint Job Peeling Early? What Went Wrong and How to Fix It
Importance of Precise Measurement
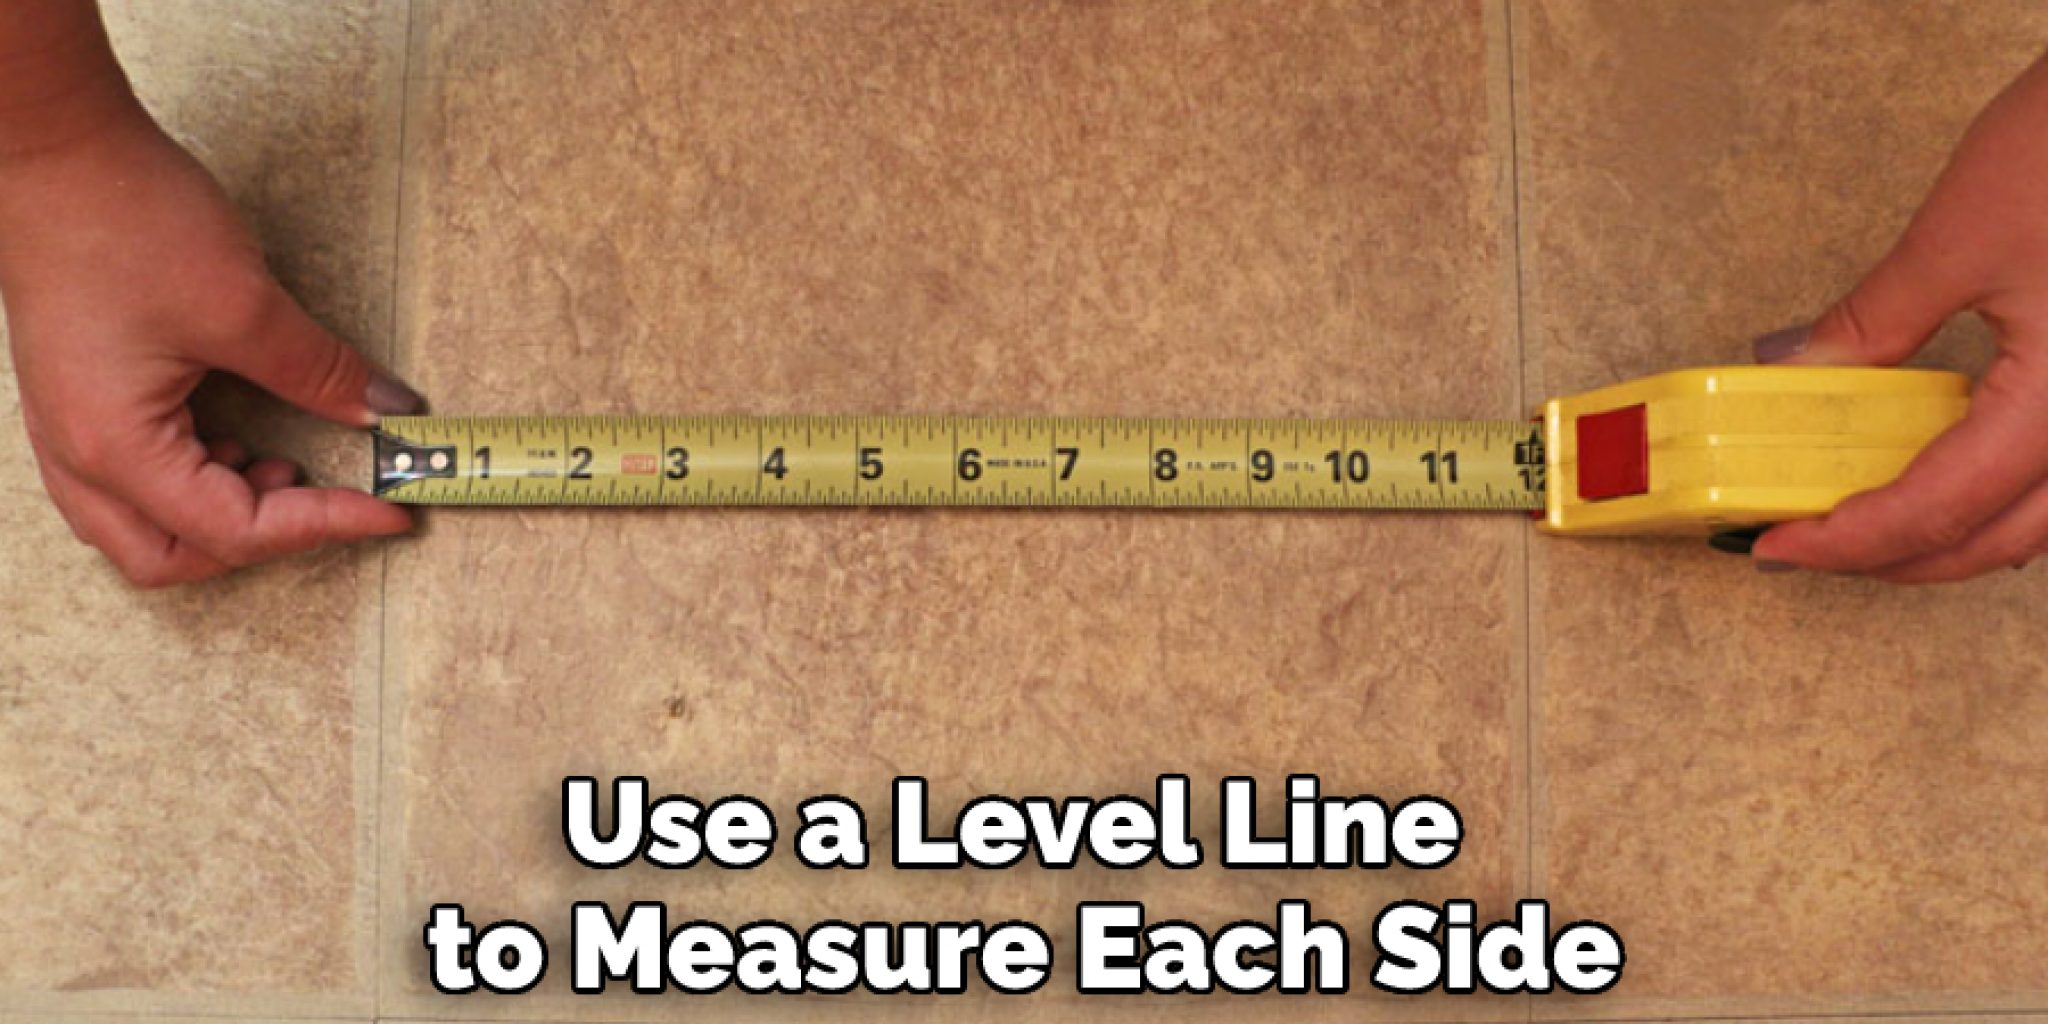
Accurate measurements are the foundation of any achievementful tiling project. Inaccurate measurements lead to uneven gaps and inconsistencies in the grout lines. The slightest miscalculation can throw off the entire pattern, especially when dealing with large areas. The key here is precision. A thorough method for precise measurement includes using a level to ensure the initial tile placement is on a true plane. Employ a ruler or tape measure to account for every tile’s exact size for spacing.
Utilizing a Tile Spacing Tool
Using a dedicated tile spacing tool is an effective technique for maintaining consistent spacing. These tools can help ensure that tiles are laid out exactly as planned, regardless of the size of the area. Alternatively, you can manually calculate spacing using a simple formula. Knowing how to utilize this tool can improve your tile work.
Preparation and Techniques for Even Spacing
Preparing the Subfloor for Tiling
A perfectly level subfloor is paramount for achieving even tile spacing. Ensuring the subfloor is flat and stable eliminates the possibility of the tiles shifting during the installation process. Any irregularities in the subfloor can throw off the whole layout, leading to unwanted gaps or overlaps. Proper preparation involves a thorough inspection and leveling of the surface to reduce these factors.
Adhering to Tiling Techniques
Consistent adherence to proper tiling techniques, such as ensuring tiles are firmly affixed to the adhesive, plays a vital function in creating uniform spacing. Consistent pressure when applying adhesive, careful handling of tiles, and a systematic process for spacing can ensure even spacing. Employing techniques like using tile spacers is recommended.
Troubleshooting and Addressing Variations
determineing and Correcting Issues
Sometimes, despite meticulous planning, slight variations in tile spacing can still occur. Recognizing and understanding these variations is the first step in correcting the problem. Uneven tile spacing often stems from several varied issues. Some potential issues include imperfections in the subfloor, discrepancies in tile size, or inconsistencies in adhesive application. If you notice an issue, it’s optimal to address it immediately to avoid more extensive issues later.
Utilizing a Digital Level for Accuracy
Using a digital level, especially for larger projects, can offer accurate and repeatable readings. A level helps to ensure the surface is flat and ensures a uniform pattern across large areas. This tool will help achieve more precise spacing during placement.
Maintaining Consistency Throughout the Project
Utilizing Grid Lines for Planning
Employing a grid system to mark out spacing is a simple but effective technique for maintaining consistency throughout the entire project. A grid offers a framework for precise placement, making it easy to maintain consistency, especially when dealing with a large space. This system will help to ensure that all rows and columns are consistent.
Maintaining Uniformity
Maintaining uniform spacing is a key factor in ensuring the aesthetic appeal of a tiled surface. Implementing a systematic approach to tiling, utilizing instructions and tools, is critical to producing a professional look. This includes maintaining uniform spacing throughout the entire project and re-evaluating your technique if needed, which is a crucial part of achieving consistency.
In conclusion, achieving consistent tile spacing in DIY flooring projects is achievable with careful planning, precise measurements, and the right tools. Understanding the common causes of uneven spacing and employing the strategies outlined in this guide will empower you to create a beautiful and professional-looking floor. Remember, precision and patience are key to achievement. Ready to tackle your next tiling project with confidence? Visit our website for more DIY tips and inspiration!