Ceiling paint dripping during use is a common frustration for homeowners and professional painters alike. This dreaded issue can lead to costly mistakes and wasted materials. This comprehensive guide dives deep into the causes and solutions for ceiling paint dripping, offering proven methods to ensure a clean and professional finish. This article provides a step-by-step strategy, focusing on crucial preparation steps, application techniques, and choosing the right tools for the job. We’ll explore the various causes of drips, from inadequate surface preparation to inappropriate application methods, and provide practical solutions to avoid these messy situations.
Understanding the Causes of Ceiling Paint Dripping
Inadequate Surface Preparation
One primary reason for paint dripping is insufficient surface preparation. A poorly prepared surface lacks the necessary adhesion properties, leading to uneven application and subsequent drips. Old, flaking paint, loose textures, or uneven surfaces can all contribute to this problem. Proper surface preparation involves thorough cleaning, patching, sanding, and priming, ensuring a smooth, even canvas for the paint. The most common mistakes are failing to completely remove old paint, not filling in cracks and crevices properly, or neglecting to apply an appropriate primer. Ignoring these steps can result in drips during the application process, requiring re-work and increased labor costs. If your wall is badly damaged or very old, you might want to hire a professional to fully prepare the surface.
Inappropriate Paint Selection
Certain types of paint are more prone to dripping than others. Thick or high-viscosity paints, often designed for specific purposes like masonry or outdoor use, tend to flow slower, resulting in a greater chance of drips during application. Using paints specifically formulated for ceilings can reduce this issue, as they’re usually designed with faster-drying properties and a smoother consistency. Understanding the properties of the paint being used is crucial to successful application and can significantly reduce the potential for drips and wasted resources. Different types of paints have different properties, so selecting a ceiling-specific paint is often a worthwhile investment.
Incorrect Application Techniques
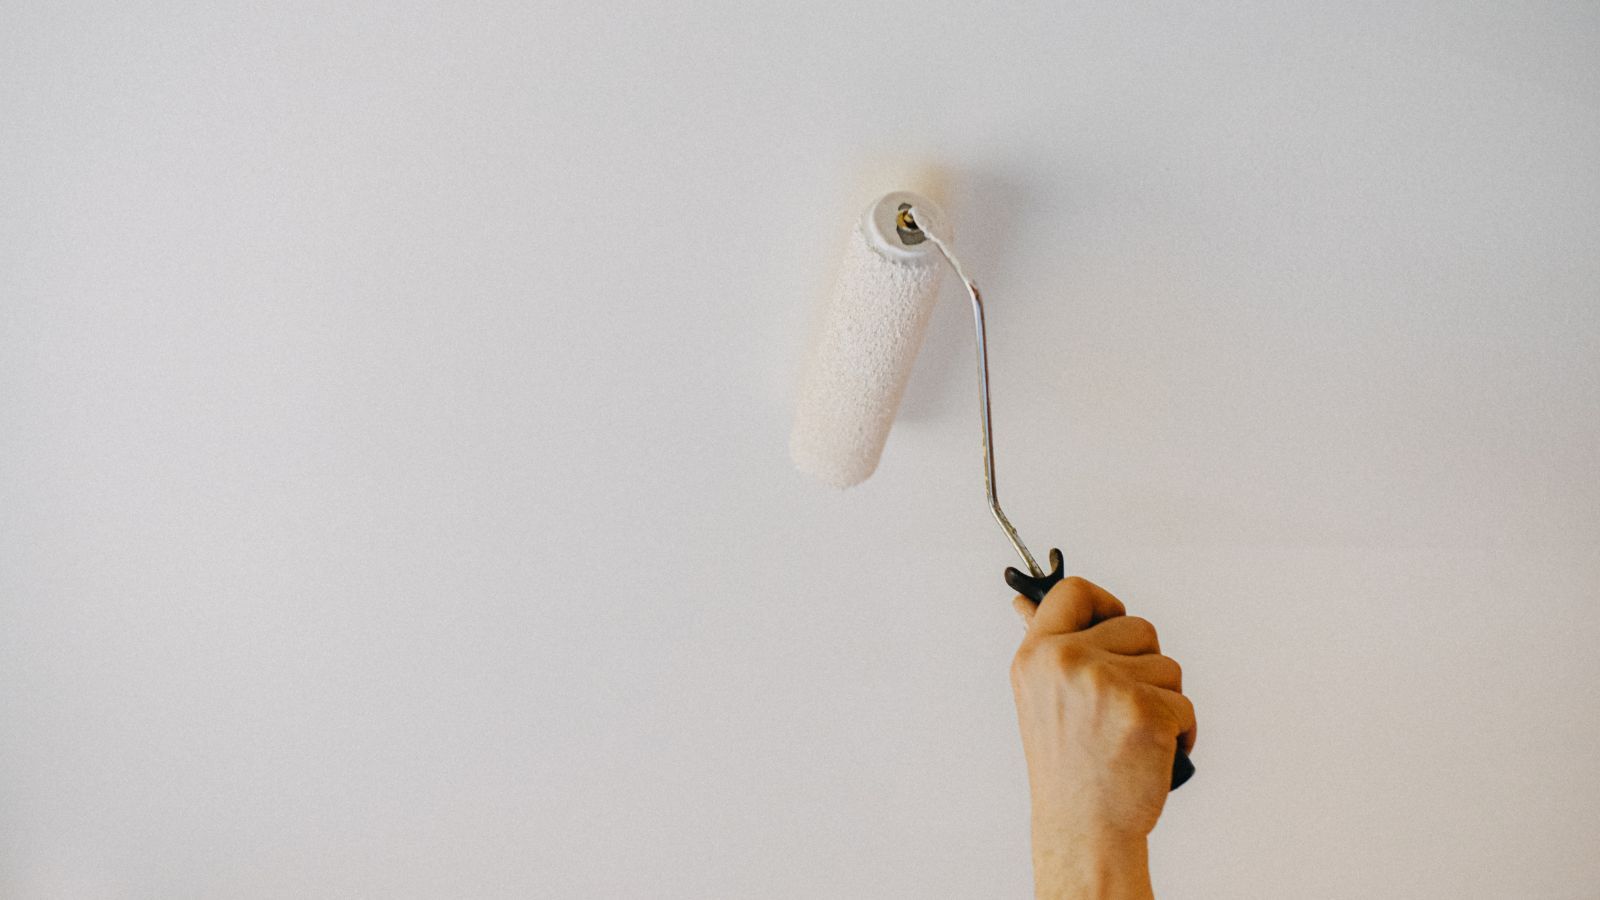
Using the wrong tools or inappropriate techniques is a leading cause of dripping. Applying paint too thickly or in too much volume at once can easily cause excess to run down the wall. A slow, steady, and methodical approach is key to avoiding drips. An excess amount of paint on the brush or roller is a recipe for disaster. Ensure you apply paint in thin, even coats. If possible, practice applying the paint in a test area or on a small portion of the ceiling before starting to work on the entire area. This practice will assist in familiarizing yourself with the paint’s behavior and determining the appropriate techniques for optimal results.
Related Post : Paint Bubbling on Walls After Application? What’s Causing the Problem
Choosing the Right Tools for the Job
Paint Roller and Tray
Employing the right tools is essential for efficient and controlled paint application. A high-quality paint roller, designed specifically for ceilings, can help distribute the paint evenly across the surface. Using a paint tray can help you regulate the amount of paint applied to the roller, which is crucial for avoiding drips. A proper paint tray will prevent excess paint from building up on the roller, reducing the likelihood of drips. Ensure your roller cover is appropriate for the type of paint being used. Different roller covers are suited to different paint types, so choosing the right one can greatly assist with a smooth finish.
Paintbrushes for Detailed Areas
For detailed areas and corners, a high-quality paintbrush can prove invaluable. Choosing a brush with appropriate bristles and a suitable size for the area is important. A brush that’s too large will lead to excess paint on the brush, increasing the possibility of dripping. Ensure that the bristles of the paintbrush are firm enough to distribute the paint evenly and avoid clumping and pooling. Focus on working in small sections and applying thin coats of paint to prevent excess from dripping.
Drop Cloths and Safety Gear
Protect your floor and work area by using drop cloths or plastic sheeting. This preventative measure will protect your surfaces from paint splatters, drips, and accidental spills. Using appropriate safety gear, such as eye protection and gloves, is crucial for minimizing the risks of paint exposure and maintaining a safe workspace during the ceiling painting process. Proper safety measures can prevent potential accidents, save time, and money. Following safety guidelines is important, for both the painter and the building.
Preparing the Surface for a Drip-Free Finish
Thorough Surface Cleaning
Thorough cleaning of the surface is critical before painting to ensure proper adhesion. This involves removing dust, dirt, and any loose debris, which can prevent the paint from adhering to the ceiling properly, leading to drips. Ensure that the surface is completely free of debris to prevent uneven paint application. A clean surface is the first step to a successful ceiling painting project.
Repairing Damaged Areas
Identify and repair any cracks, holes, or other imperfections in the ceiling. These imperfections can trap excess paint, leading to drips. Use appropriate patching materials to fill gaps, ensuring a smooth surface. Proper patching and repair steps before painting can minimize the likelihood of drips and achieve a high-quality finish.
Priming for Enhanced Adhesion
Applying an appropriate primer before painting is often a crucial step, particularly for older ceilings. Priming helps to create a smooth and even surface, enhancing paint adhesion, minimizing the risk of drips. Primer will make the paint stick to the surface better, even in tricky areas. A good primer helps with even application and prevents problems with drips.
Applying Paint for a Drip-Free Ceiling
Avoiding Overlapping Strokes
Use techniques that avoid overlapping strokes, as this can create unnecessary buildup of paint, increasing the likelihood of drips. Apply paint in thin, even coats, and work in small, manageable sections to minimize the risk of excess paint accumulating, which could lead to dripping. Focus on consistent and controlled strokes. Consider starting from one corner and working in a systematic manner across the ceiling, following the same pattern for each coat to ensure a seamless and even finish.
Thin Coats and Slow Application
Employing thin coats and a slow application technique can significantly reduce the chance of dripping. Applying paint too thickly in one go creates excess paint, leading to dripping issues. A gradual approach allows the paint to dry between coats, mitigating the risk of drips and creating a smoother, more professional-looking finish. This technique allows for optimal coverage and minimizes the occurrence of drips by allowing the surface to absorb the paint evenly.
Monitoring and Adjusting Techniques
As you work, monitor the application process carefully and adjust techniques as needed. Pay attention to how the paint is spreading and the rate at which it dries. If you notice any areas with a tendency to drip, adjust your application method to minimize or eliminate the drips. It is important to be aware of these subtle cues to achieve a smooth and even finish.
Dealing with Drips and Fixes
Immediate Action for Drips
If a drip does occur, immediately address it. Use a clean cloth or sponge to gently remove the excess paint before it sets and dries, then use a scraper and solvent to lift away any remaining paint.
Prevention is Better Than Cure
Prevention, as with most things in life, is crucial. Following the steps discussed, from correct surface preparation to slow and controlled application, significantly reduces the likelihood of drips. The right technique, using the right paint, and the right materials are crucial for minimizing the risks of drips and achieving a flawless finish.
Alternative Paint Application Methods
Consider using a sprayer or other specialized application tools, depending on the desired coverage and ceiling type. For ceilings that are hard to reach or have intricate shapes, using a sprayer can be a significant advantage in terms of both time and efficiency. If the situation warrants it, seeking the help of a professional painter can eliminate the hassle and risk of uneven application. Following professional advice can significantly decrease the chance of dripping issues.
In conclusion, preventing ceiling paint drips during application is achievable with meticulous preparation, proper technique, and quality tools. By following the steps outlined in this article, you can avoid the frustration and expense of messy mistakes, ensuring a flawless finish to your painting project. Remember to choose the right paint, prepare the surface thoroughly, and apply the paint efficiently and strategically for optimal results. For any further queries, you can refer to the FAQs section below. Now, you can confidently tackle your next painting project, knowing you have the knowledge to achieve professional-quality results, without the hassle of drips.